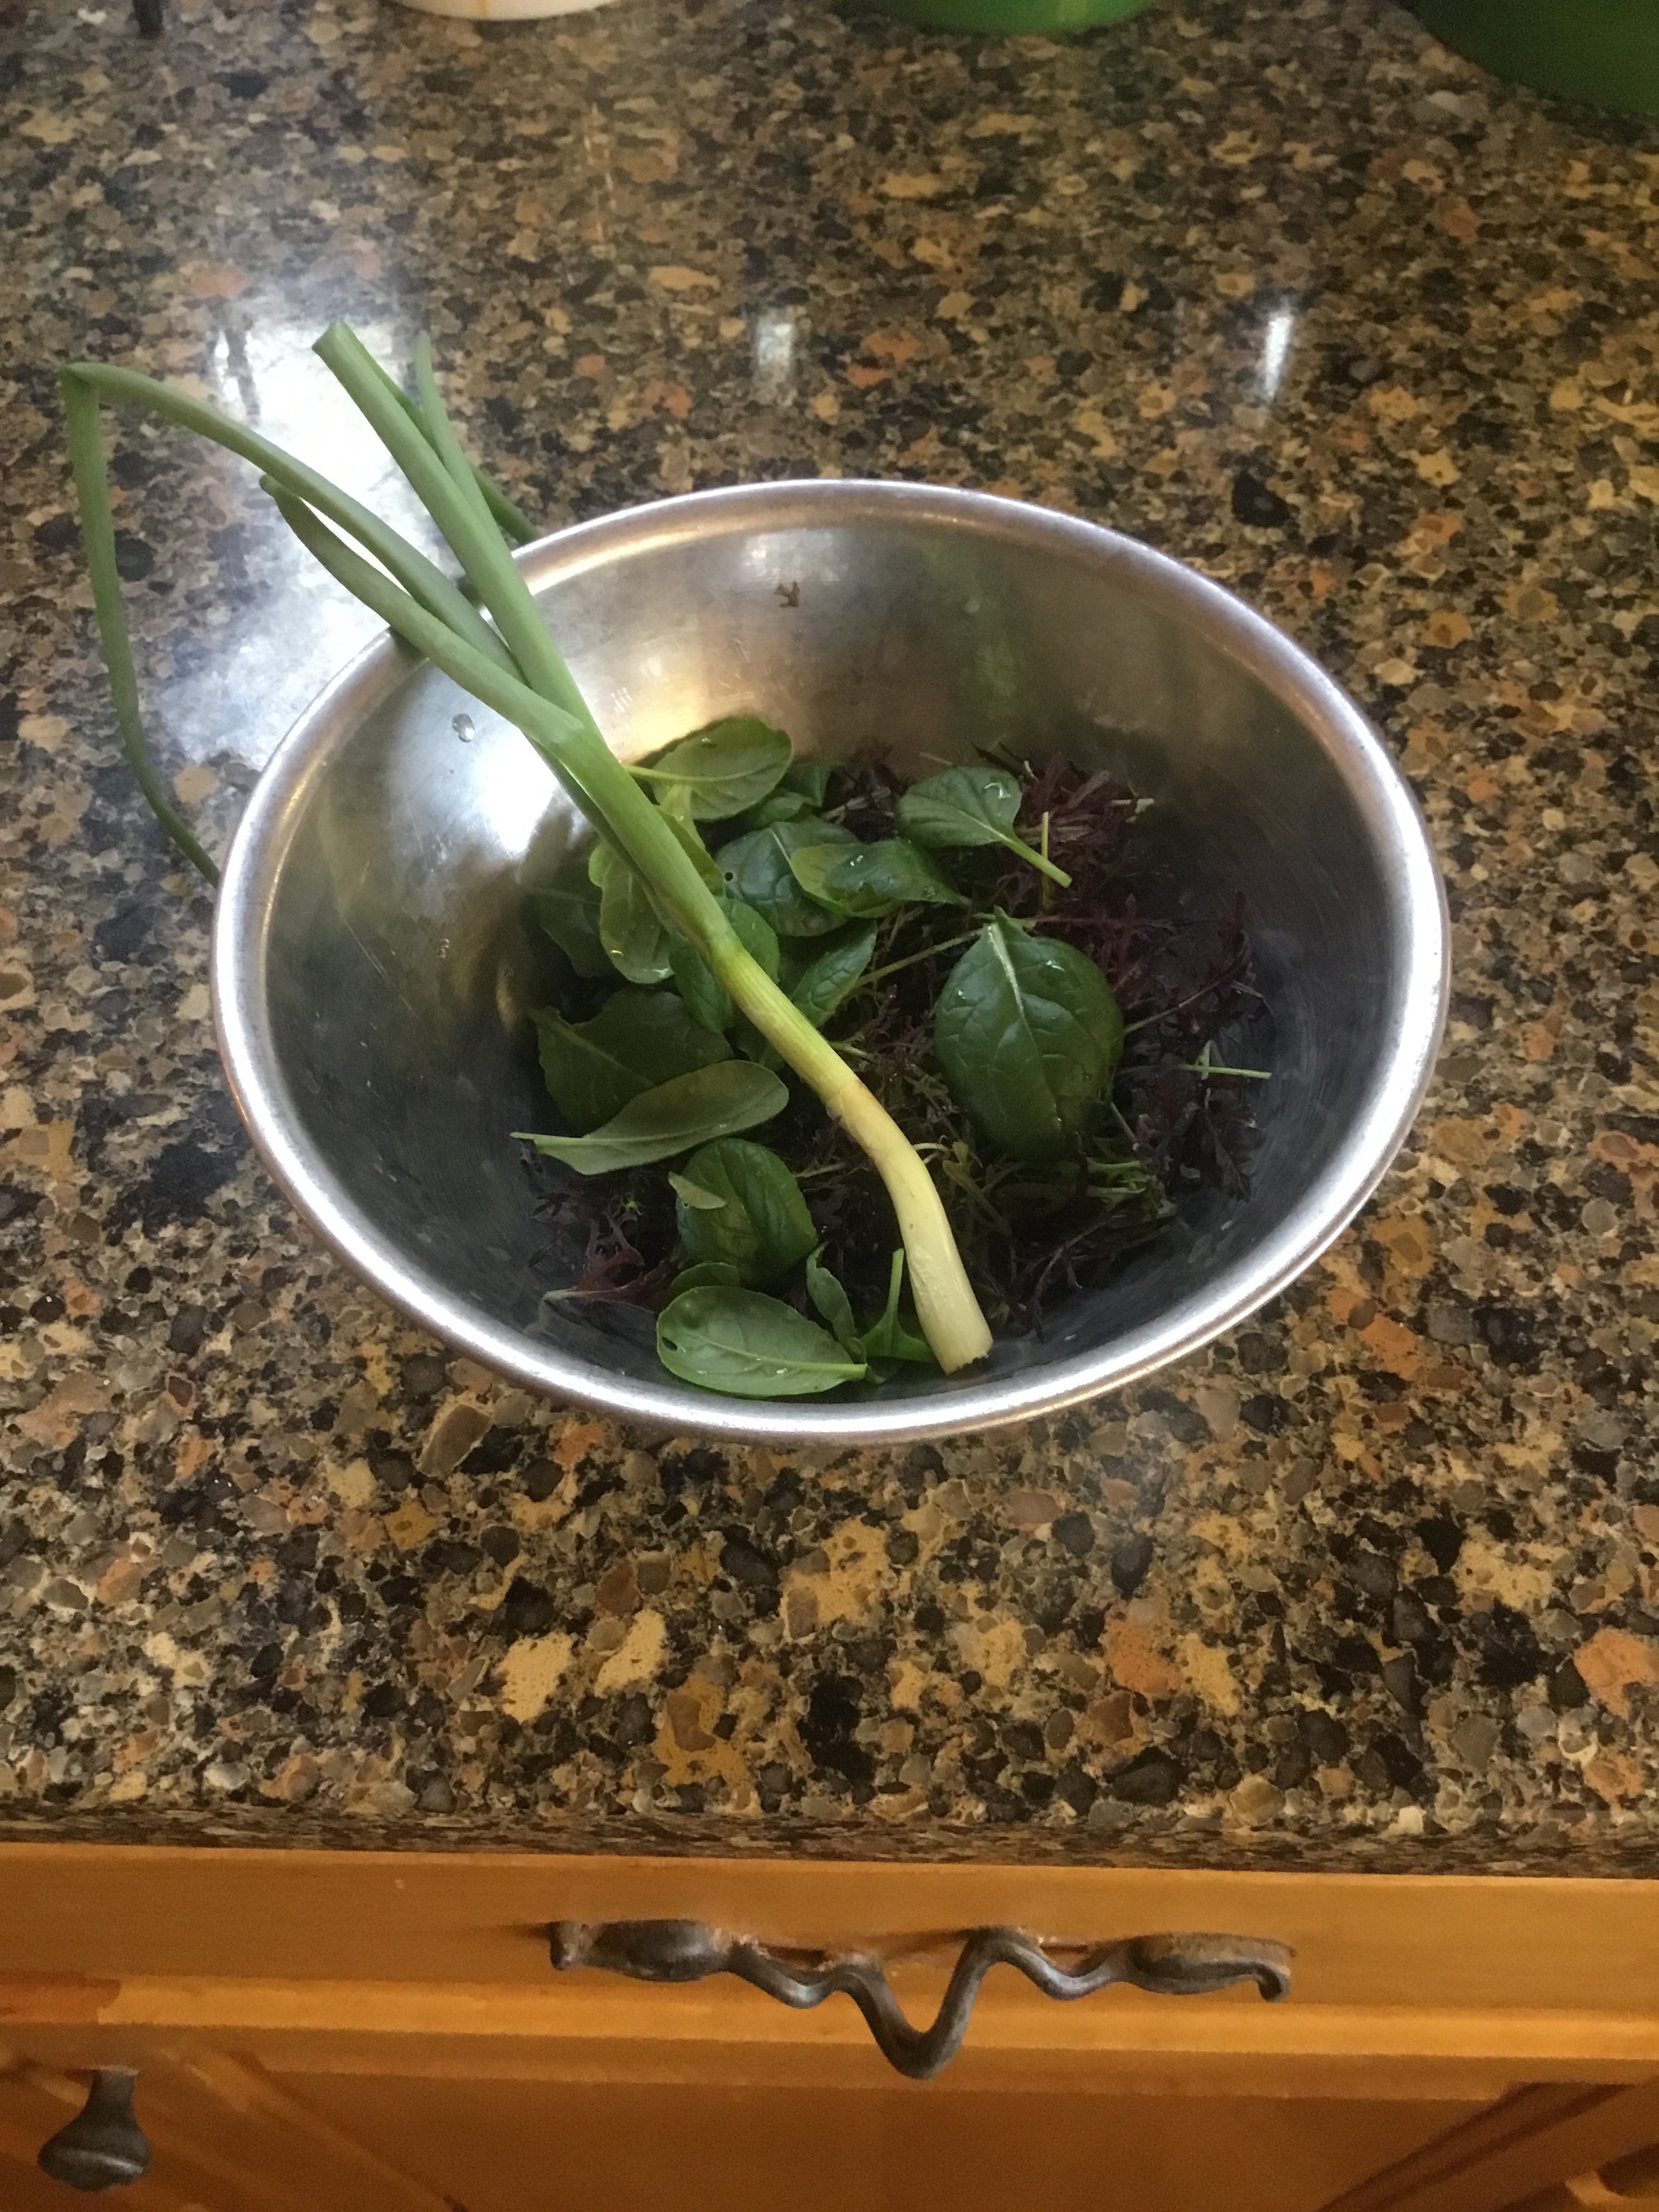
We scored some local beef Chuck Eye Steaks yesterday, and decided it was steak and salad time. Our token veg was Crowder peas, unfortunately made from dried ones, as we have eaten our way almost completely though our freezer. Good thing the official opening of the Festhalle Farmer’s Market is next weekend.
But we had homegrown fresh greens for the salad. As Neil Young rightly said. “Homegrown is the way it should be.” We topped the salad with my Half A Remoulade sauce, a go to around here. Half A means half a**ed.
Ingredients
Mayonnaise
Ketchup
Lemon Juice (we use Meyer Lemon Juice)
Salt
Dill Pickle, finely chopped
Capers, finely chopped
1 Scallion
Tabasco Sauce
We use this on everything from Salads to Po-Boys. Add some extra hot sauce for the Po-boys. Proportions for this sauce are between you and your conscience.
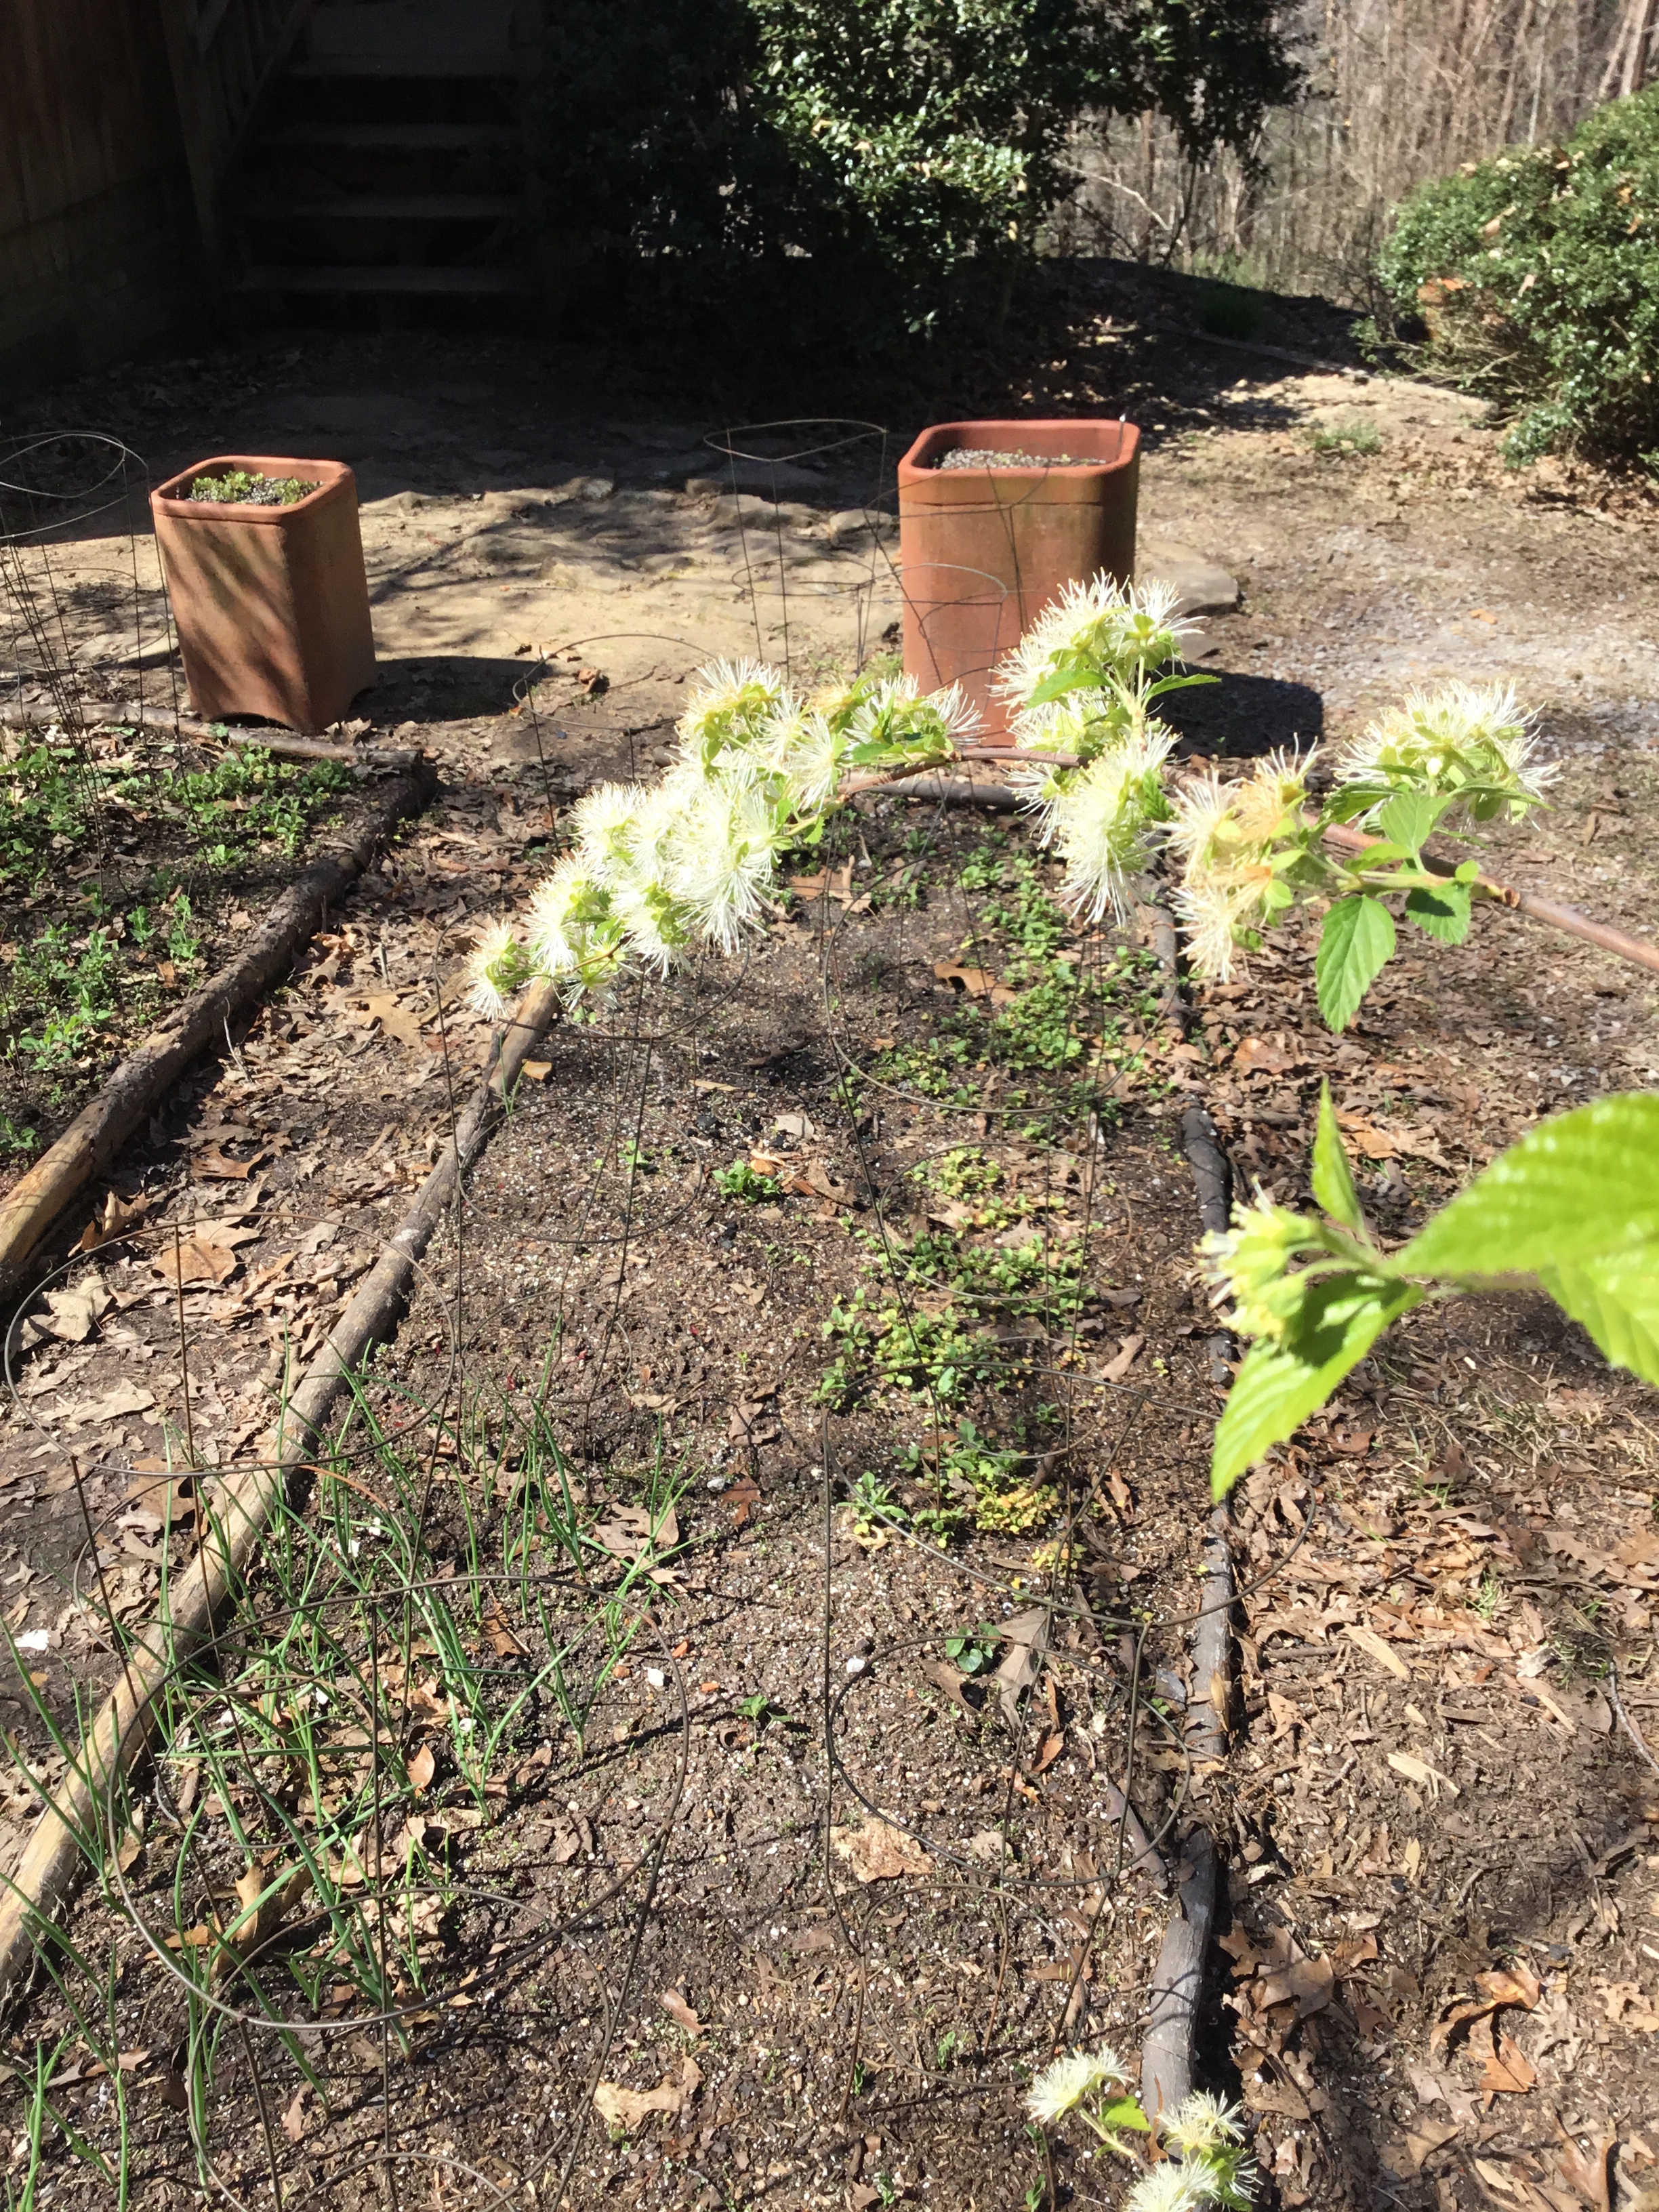
And now for some gratuitous spring blooming shrub pictures.
I grew up on a farm where we had 10,000 chickens a year, and plots of fifteen acres of pink eye purple hull peas. No more of that. Here’s a typical spring garden now.
Neviusia
That’s Alabama Snow Wreath, Neviusia alabamensis, standing guard over my scallions, radishes, and peas. It’s an incredibly rare shrub. We’re already eating the scallions, and the mizuna will be next. Then comes the spring favorite: PEAS.
Green Arrow Peas, and more Mizuna
This is my first year growing Green Arrow english peas. So far the weather has been perfect, and I’ll hopefully have a recipe with fresh peas to share in a month or so.
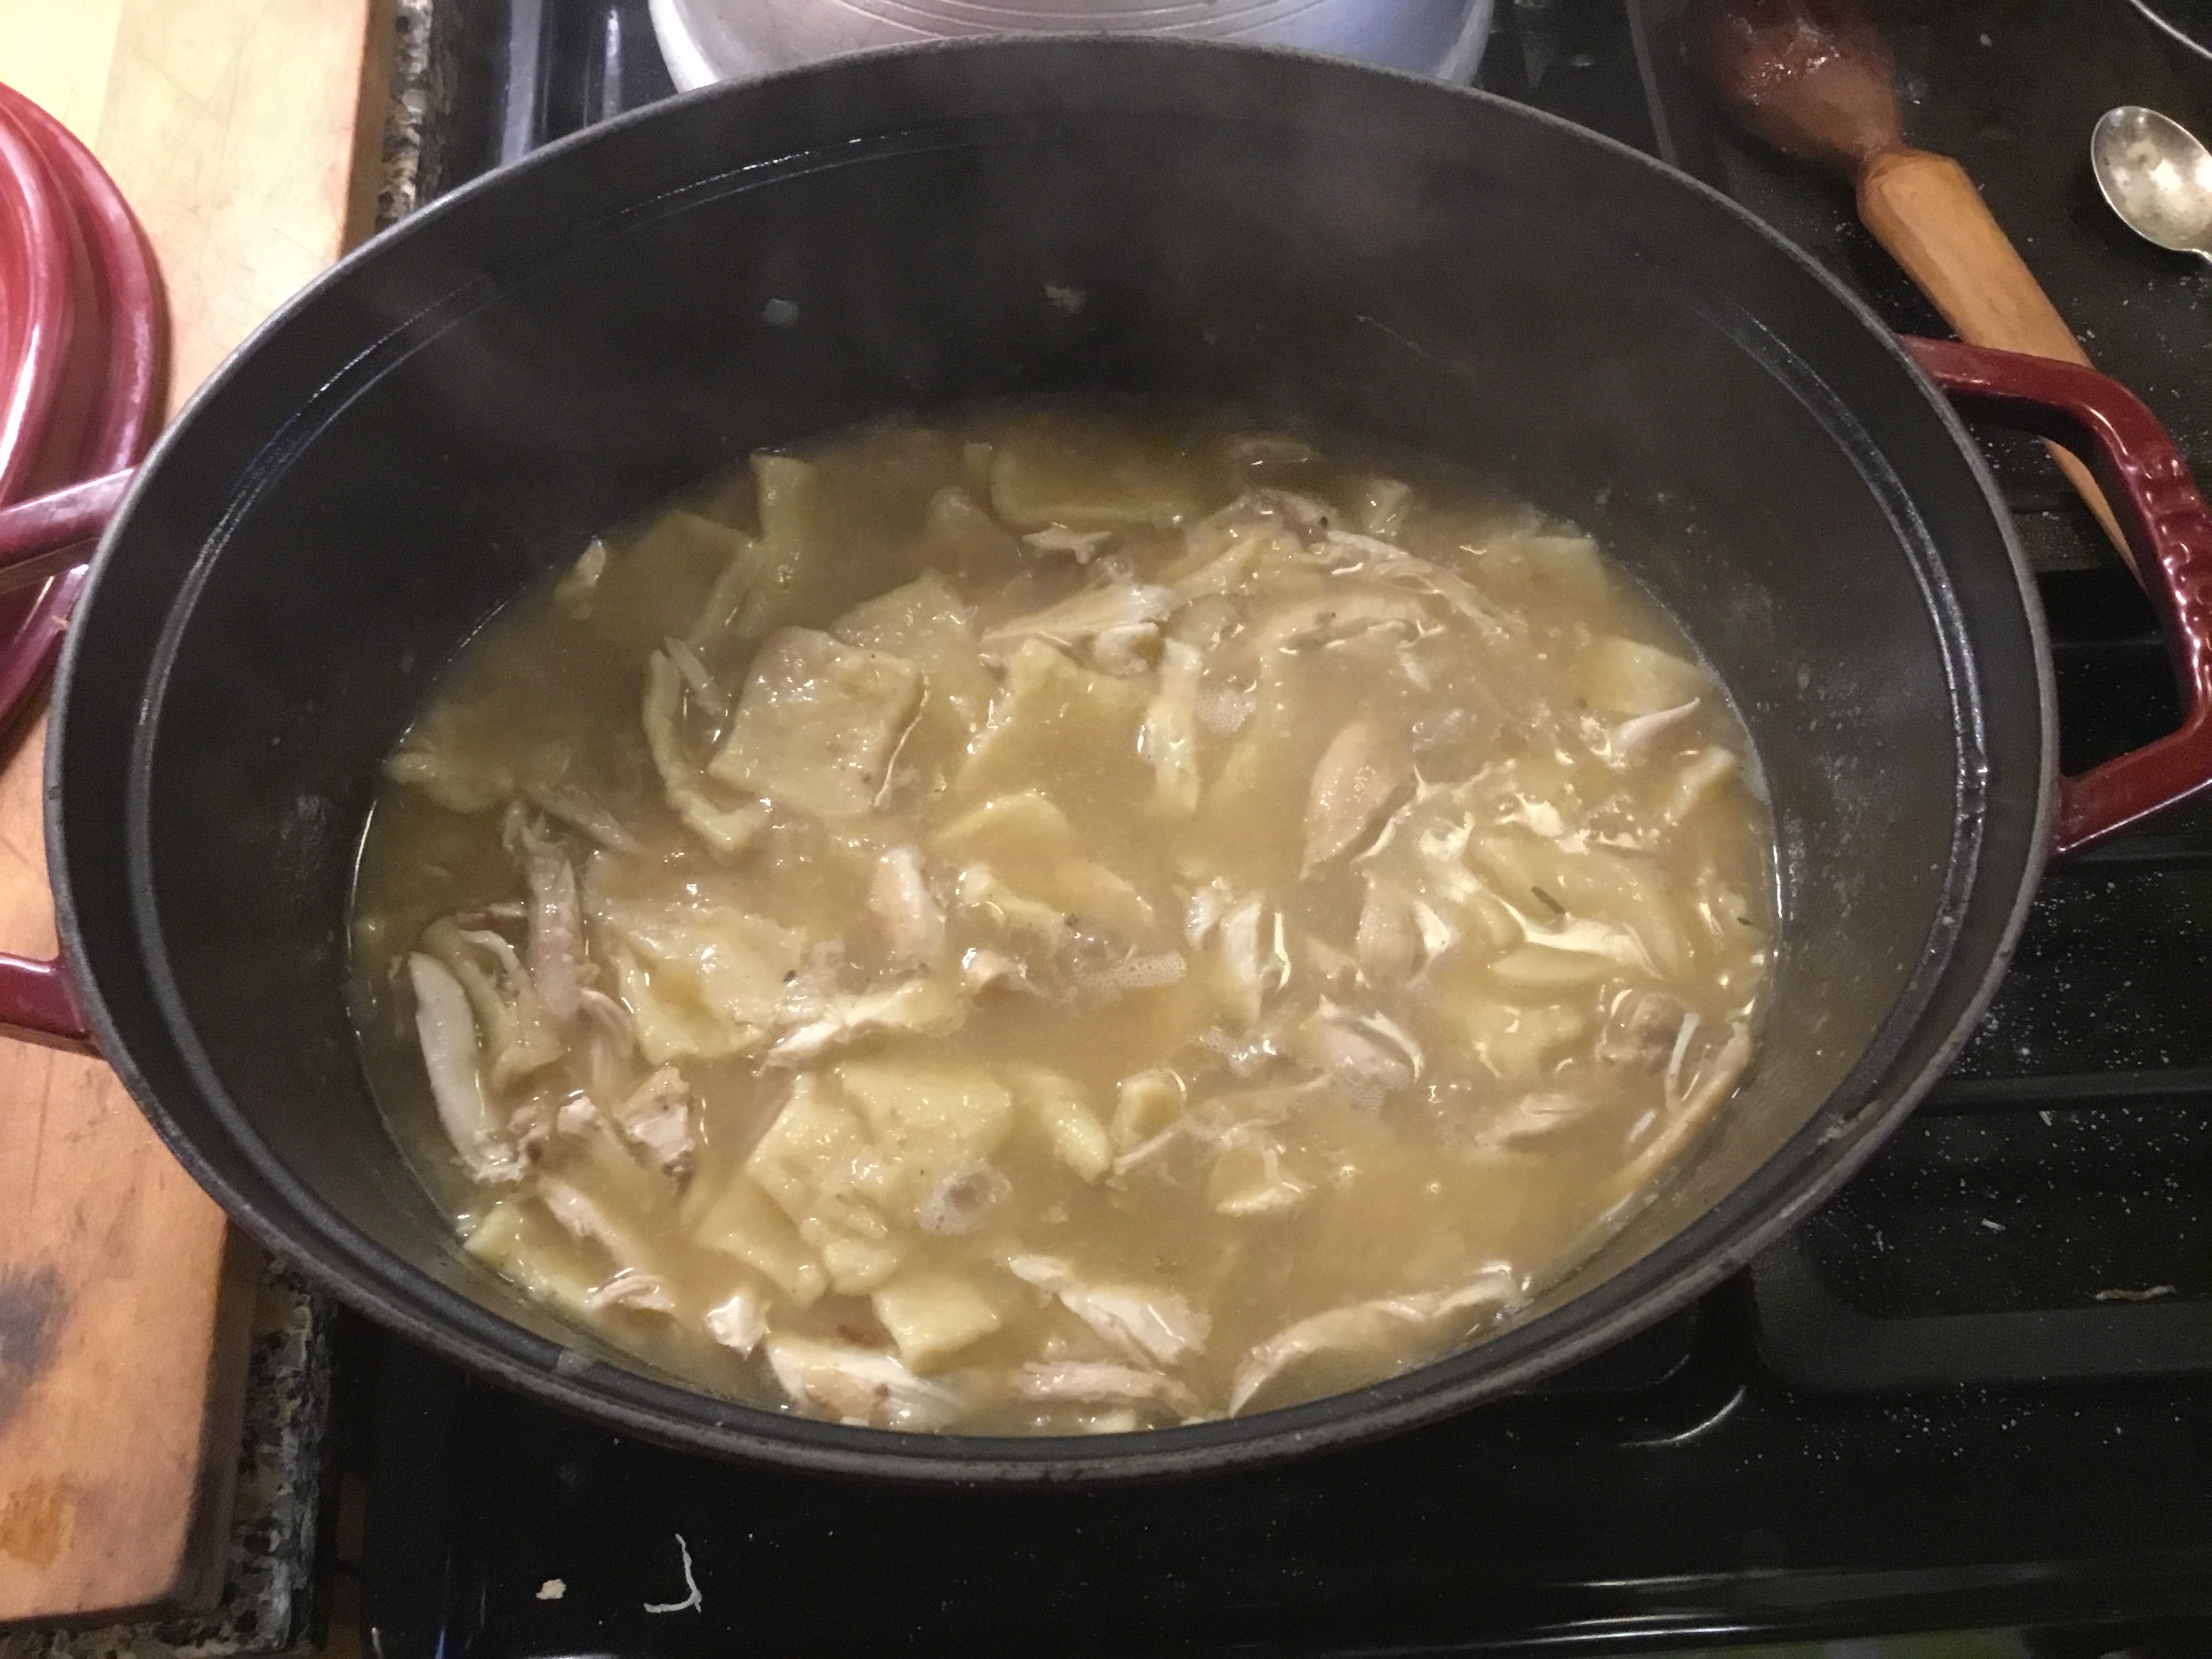
After a decade of having red beans and rice for my birthday dinner every year, I decided to go full on native this year with Rabbit and Dumplings. So why not start with a nice marinade?
Marinade for Rabbit
Wine (I have loads of Apple Wine)
1 teaspoon Sea Salt
Black Peppercorns
You only need enough wine to cover the bunny. Marinate for at least an hour, preferably overnight, and then simmer the rabbit for about forty five minutes. Add water to the marinade for the simmering. Let the cooked rabbit cool, and then make the dumplings.
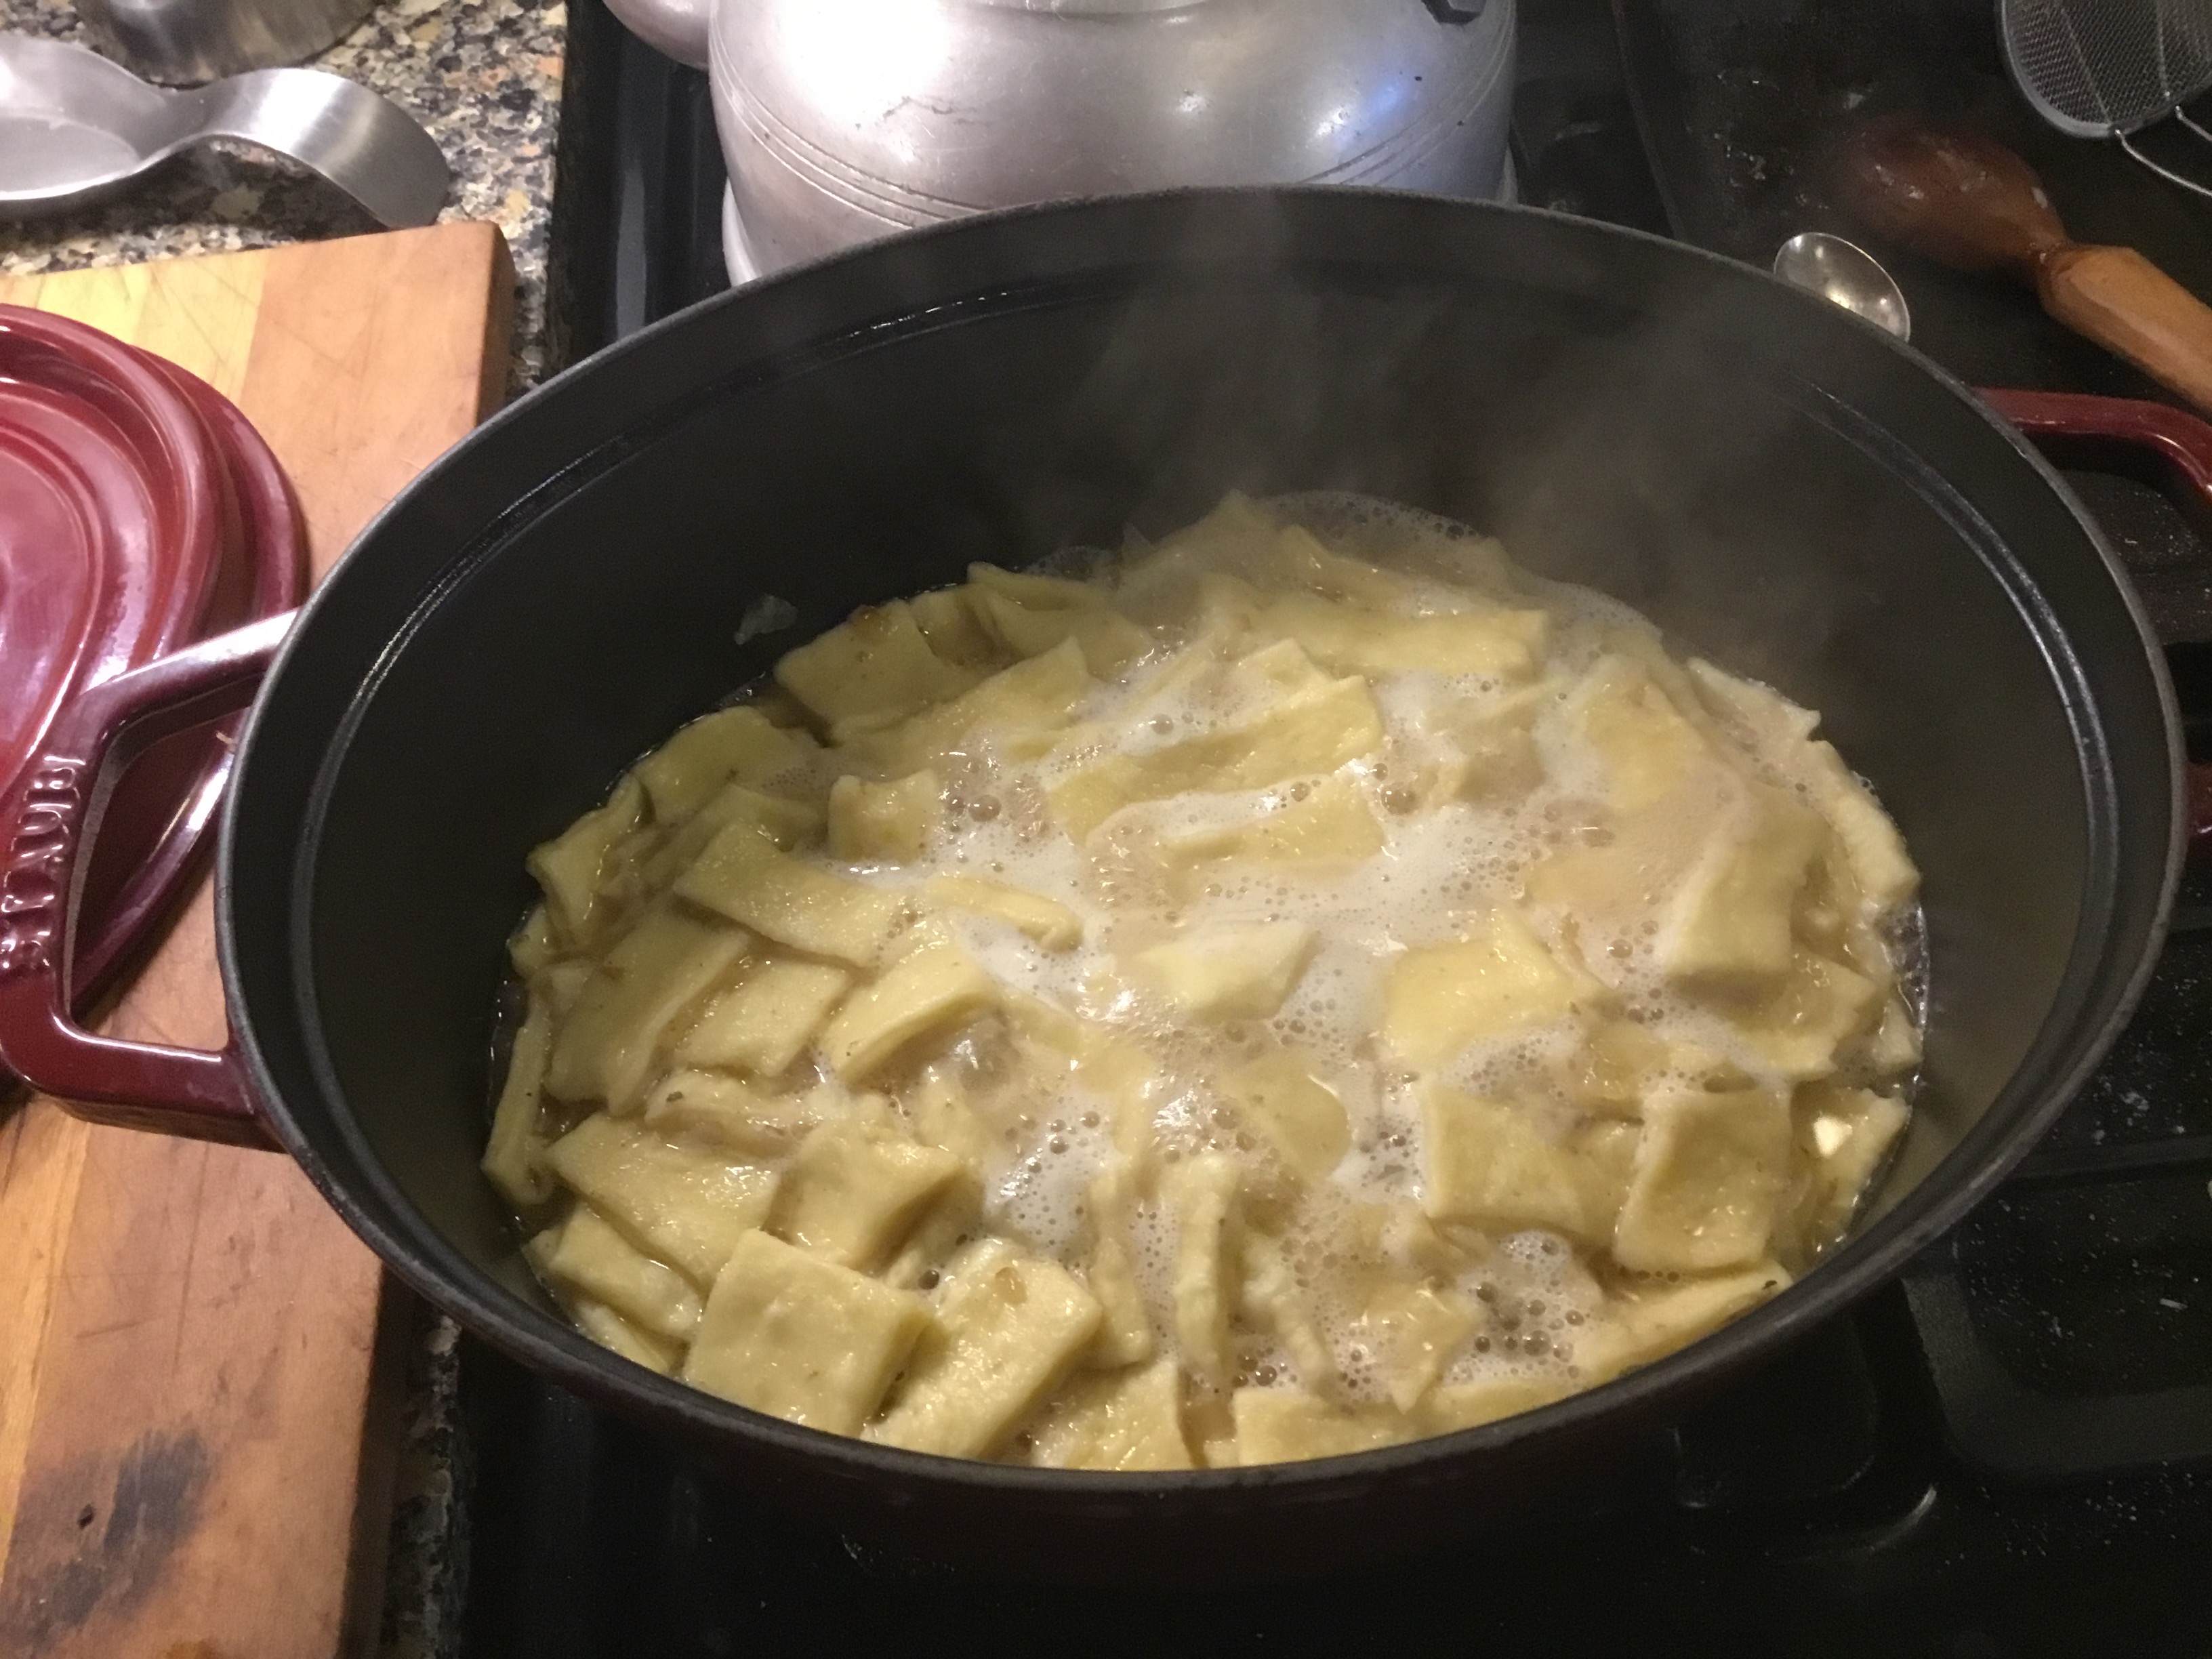
Dumplings Cooking
Dumplings
These are rolled dumplings, not the drop kind.
2 cups Flour
1 teaspoon Baking Powder
3 tablespoons Butter
2 Eggs
A little Milk
Mix these as with any dough. Keep plenty of flour handy, as they do tend to get very sticky. Roll out thin, cut into small rectangles, and cook in the rabbit cooking broth, along with:
2 cups Chicken Stock
1 Onion, chopped and cooked in Butter
Dumplings take some time to cook, so shred up the rabbit meat, and have a glass (or two) of wine. You’ll know when the dumplings are done, as they will no longer taste like raw dumplings. Finally, add the shredded rabbit meat, and heat through thoroughly.
Go to work the next day, and tell your co-workers that you ate pink-nosed bunny for your birthday, and see how they react.
The wild blueberries are blooming here now, as well as the peach trees. Give it up, winter. Spring is ready to take over.
Siehe, der Lenz lacht in den Saal!
Richard Wagner, Die Walküre
Maybe spring isn’t exactly laughing in the hall, as Herr Wagner put it, but it is time to get ready for it.
Peach Blossoms
That means the cultivated blueberries are not far behind in blooming, but I STILL HAVE A FREEZER FULL OF BLUEBERRIES FROM LAST YEAR. In an amazing moment of insanity, I planted six nice cultivars of “Rabbiteye” blueberries, which means I have enough blueberries every year to feed a family of fifty. I’m tired of blueberry wine and blueberry jam. Let’s make some pancakes, about fourteen or sixteen.
Ingredients
1/2 cup All Purpose Flour
1/2 teaspoon Baking Powder
2 pinches salt
1 tablespoon Honey
1 Egg
Milk
60+ Blueberries
Butter for Cooking
Mix the dry ingredients first, then add the wet. How much milk? Enough to get the desired consistency. Less milk means more cake to the pancake, more means more crepe like pancakes. Do I really count the blueberries? No.
Frozen Blueberries
Blueberries are the easiest fruit to freeze, and about half of one of these handy little containers is about right. Add those last, and, and mix in with a tablespoon. That tablespoon is also used to measure out the pancakes.
Heat up a griddle to hot, and then add the butter. As soon as the butter melts to the foaming stage, turn the burner down to as low as it will go. Cast iron is the easiest thing to cook pancakes on, but for speed I use a carbon steel crepe pan–and yes, it is French, so give me a break.
A heaping tablespoon of the Berry/Batter mixture makes a nice small pancake. Serve with syrup if that’s what you like. Maple is traditional, but sorghum and cane (Alaga brand) is also popular around here. Tulip poplar and hickory are also available, so I may try those as well, as we have plenty of both trees on our property.
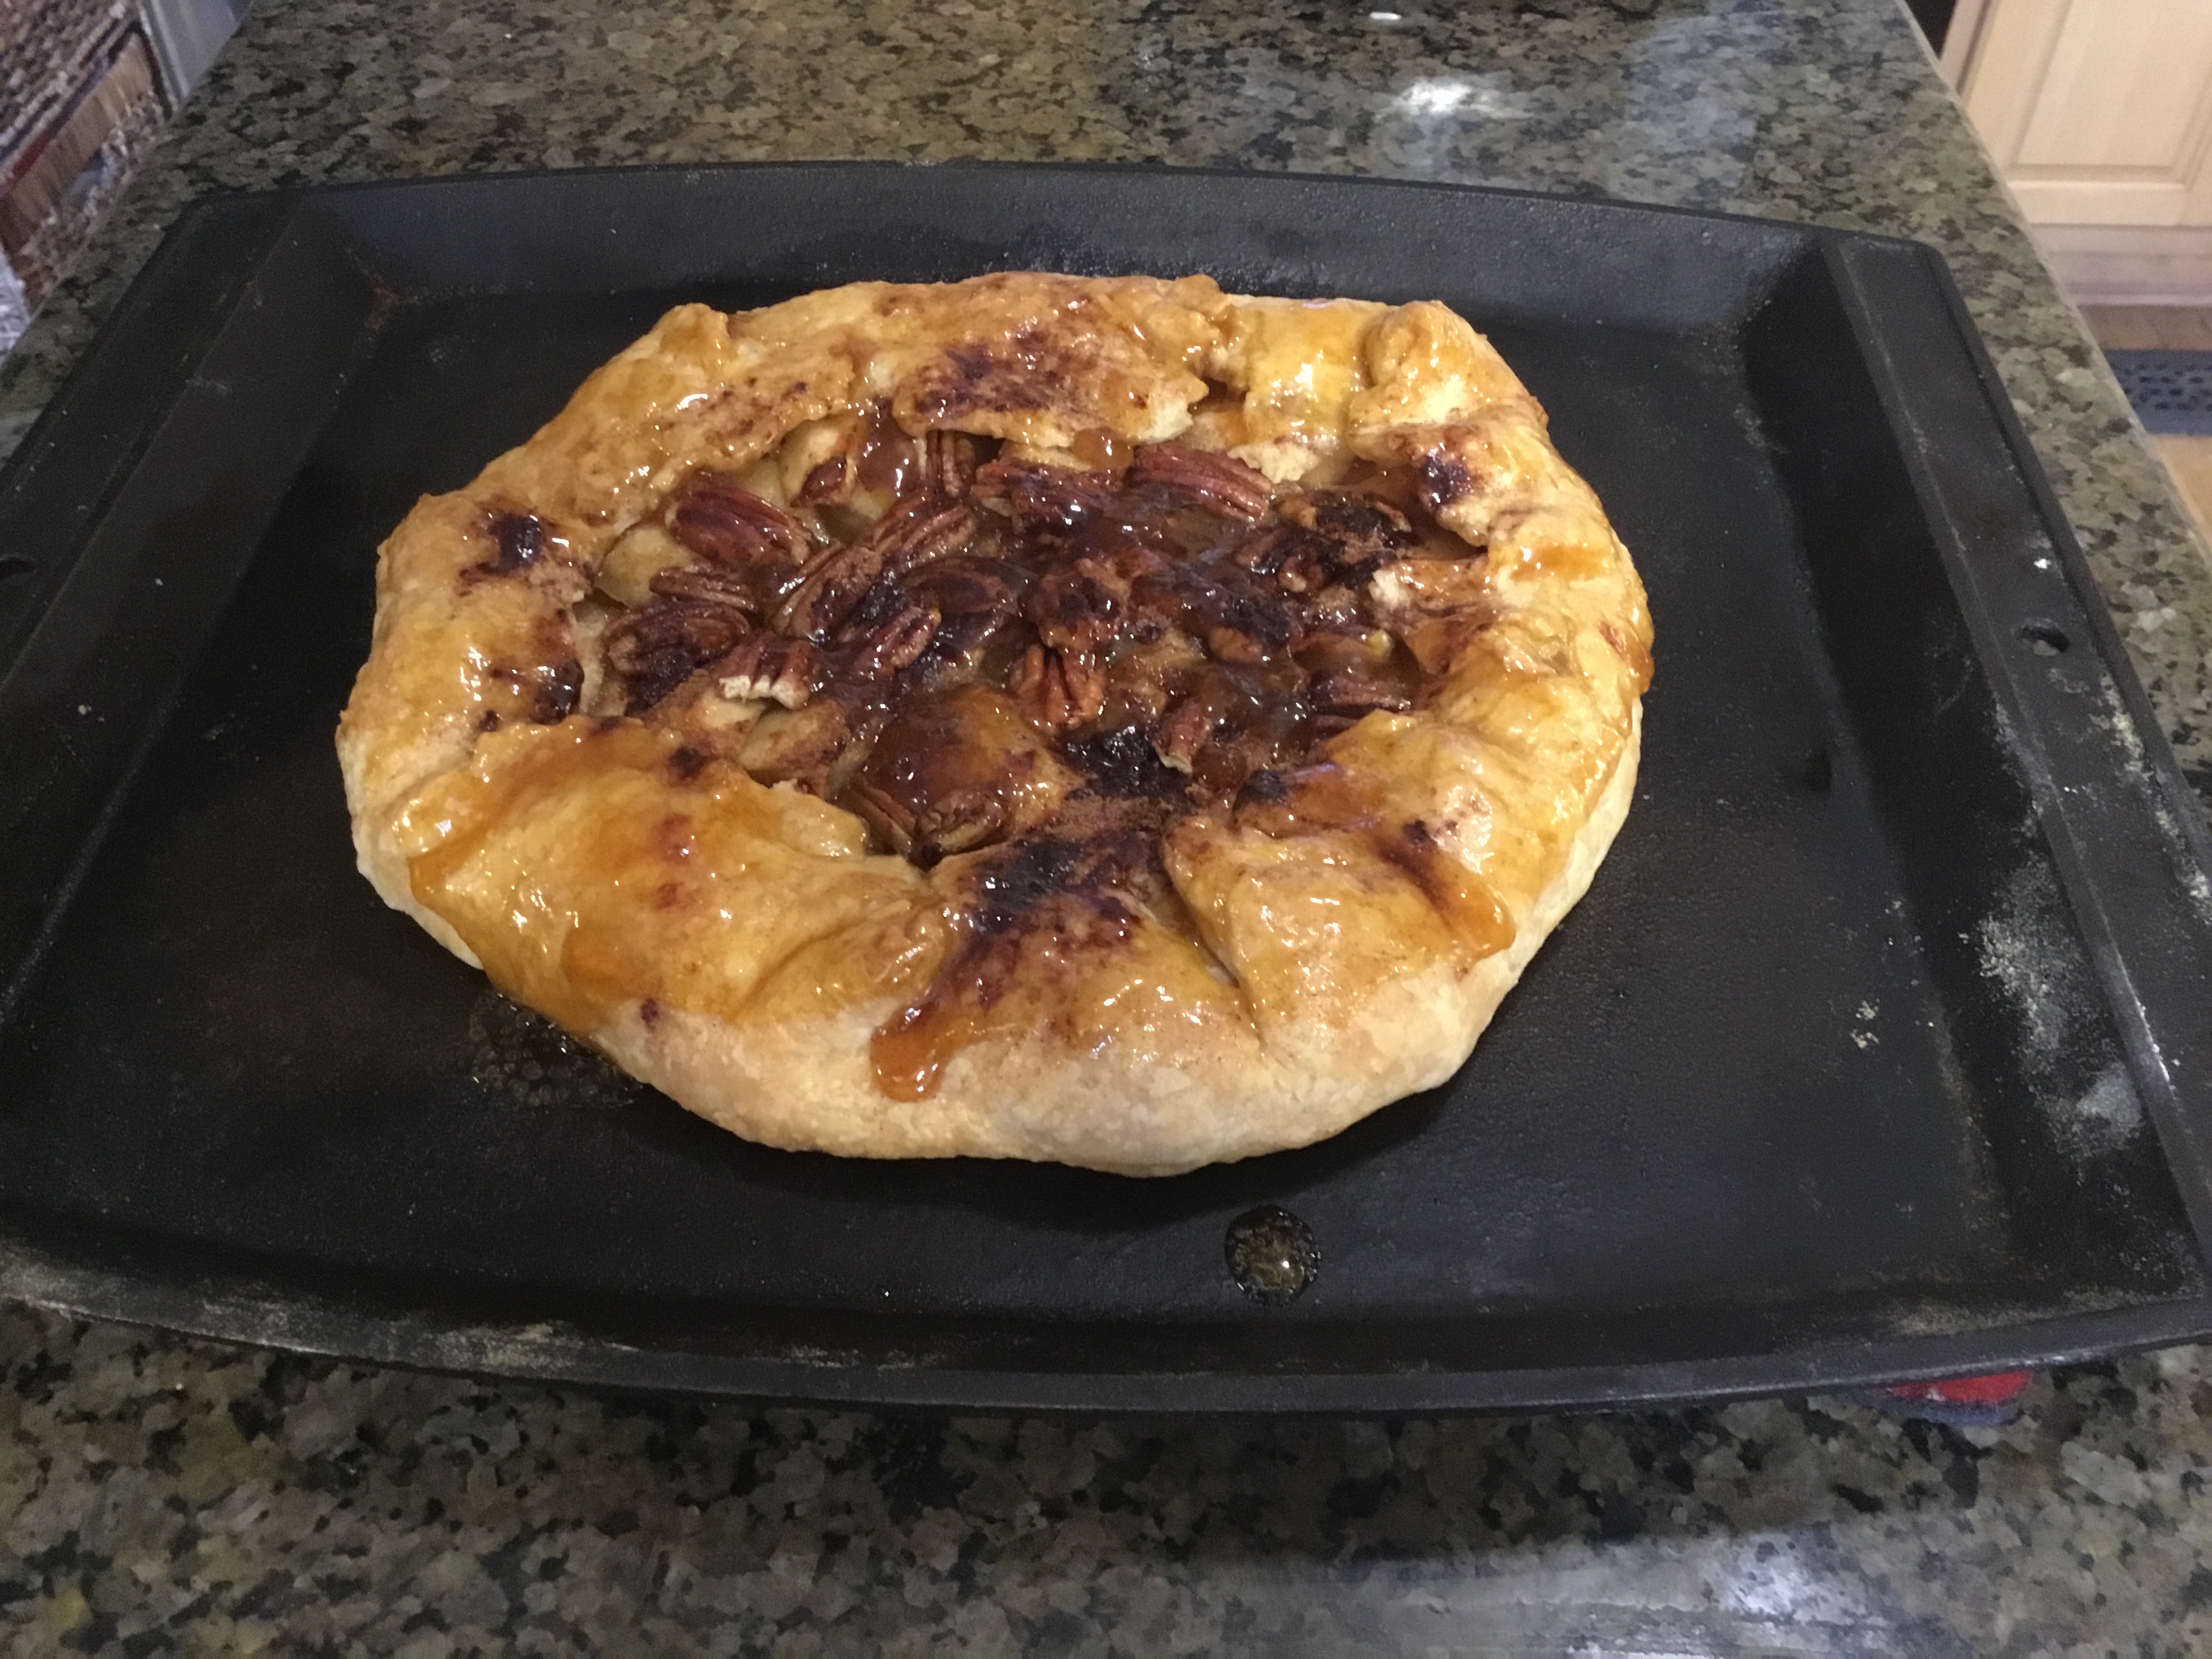
Galletes, or simple French country pies, have become something of a phenomenon in the South. In fact, there are no fewer than fifteen different galette recipes on the website of Southern Living magazine alone. This pie plateless recipe is more southern than most.
Roll out the pie dough into either a circle or a rectangle–both are fine. Transfer the dough to a baking sheet via the rolling pin method. (I really like the Lodge Rectangular Griddle that is in the picture above.) Place the peeled and sliced apples into the center of the crust, leaving at least an inch of overlapping crust available around the edges. Add the sugar and honey, break the butter into small pieces over the filling, and top with pecan halves. Finally, dust the filling with cinnamon. Fold the edges of the crust over the filling, making sure there are no gaps in the crust. Otherwise, all the good juicy stuff in the filling will run out onto the baking sheet. Bake for an hour at 400 degrees F.
While the pie is baking and the smell is driving you crazy, calm your senses by making a glaze from fruit preserves. I was going to make one from my homemade fig preserves and bourbon, but I was low on figs and someone had drunk most of my bourbon. Simmer the preserves/alcohol mixture for at least five minutes–add more booze or water if it becomes too thick. When the galette is cooked but still hot, brush on the glaze with a pastry brush. Try a slice with some vanilla ice cream, and you may never make another regular apple pie again.
A homemade pie crust is so superior to bought ones that I am almost ashamed to even make the comparison. With a couple of small exceptions and adaptations, this is the same crust that has been made in the South for decades, if not centuries. This recipe makes one crust.
Basic Pie Crust
Ingredients:
One cup All Purpose Flour
One stick Organic Butter (4 oz.)
1/4 cup Ice Water
Optional: Salt, Sugar
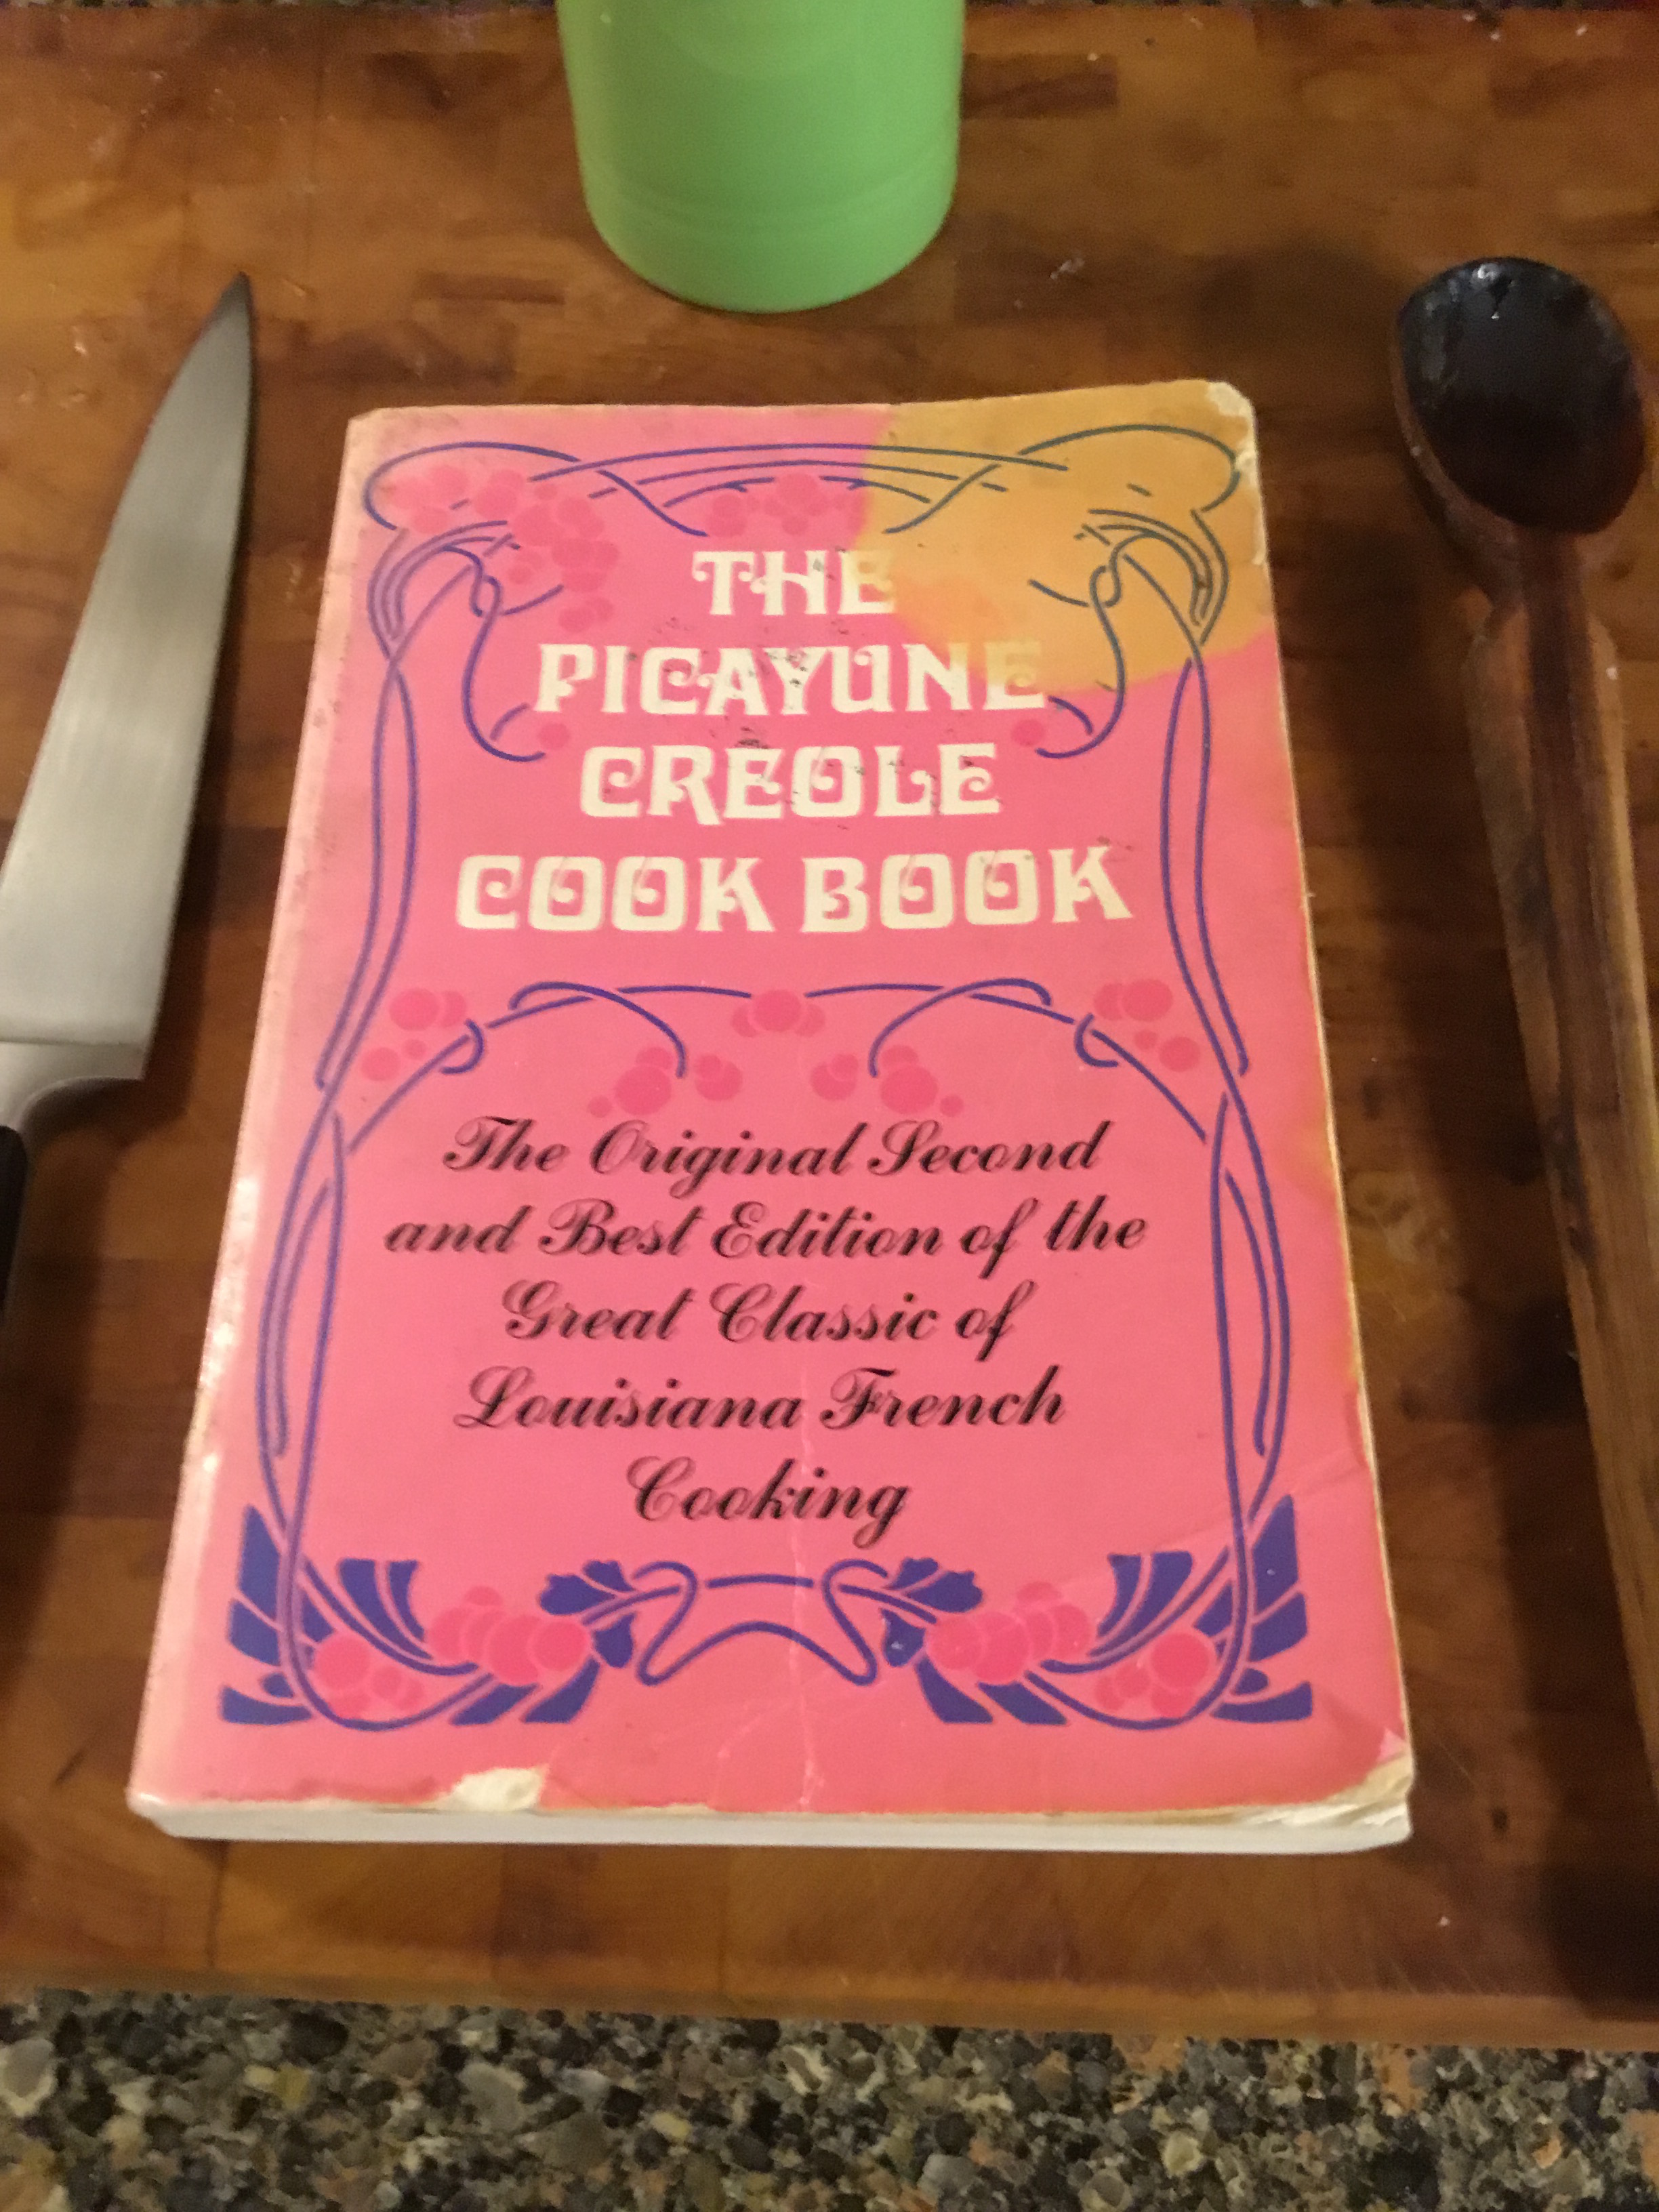
The all butter pie crust is a tradition that makes perfect sense. The Picayune Creole Cookbook even trash talks about other fats in a pie crust.
Some persons use lard for pie crust. This is to be deprecated. The crust will never have the same flavor or be as flaky as when made with butter. Others, again, mix the butter and the lard. This, too, is to be condemned, if you wish for the best results.
There you have it. Unless you want to have your pie crust condemned to Creole pastry hell, use all butter.
Now, back to the crust. Step one is to separate the butter into small, pea to rice size chunks. I use a bench scraper/pastry scraper for this step.
Add ice water, a few drops at a time.
Make a well in the center of the dough and add the ice water in small amounts. Work the dough with one hand (preferably fingertips only) until it sticks together without crumbling. Use the heel of your hand (now we go to the “fraisage” step) to make certain that the butter is well incorporated into the flour. You can accomplish this by folding the dough over a few times.
Dough ready to refrigerate
Scrap the work surface clean and roll the dough into a ball. Wrap in plastic wrap, and refrigerate for an hour or so. Then you can take out your frustrations on the dough.
Dough ready to be whacked
Spread an ample amount of flour on the work surface and give the dough a couple of good whacks. Oh, go ahead and make it as many as you like. My homemade super bad rolling pin is made of dogwood, and it’s brutalitarian. Roll out the dough as thin as you like. A thick pie crust is no good.
Crust ready to be transferred to a pie plate or form
Roll up the crust onto the rolling pin and transfer to your pie plate. Trim around the edges, and you’re done. It’s pie time.
A crust with added sugar is technically know as a pâte brisée sucrée, which strangely enough translates to pie crust with sugar. The Picayune Creole Cookbook recommends taking leftover dough scraps, cooking them as small squares, and serving with jams or preserves. A good pie crust is a terrible thing to waste.
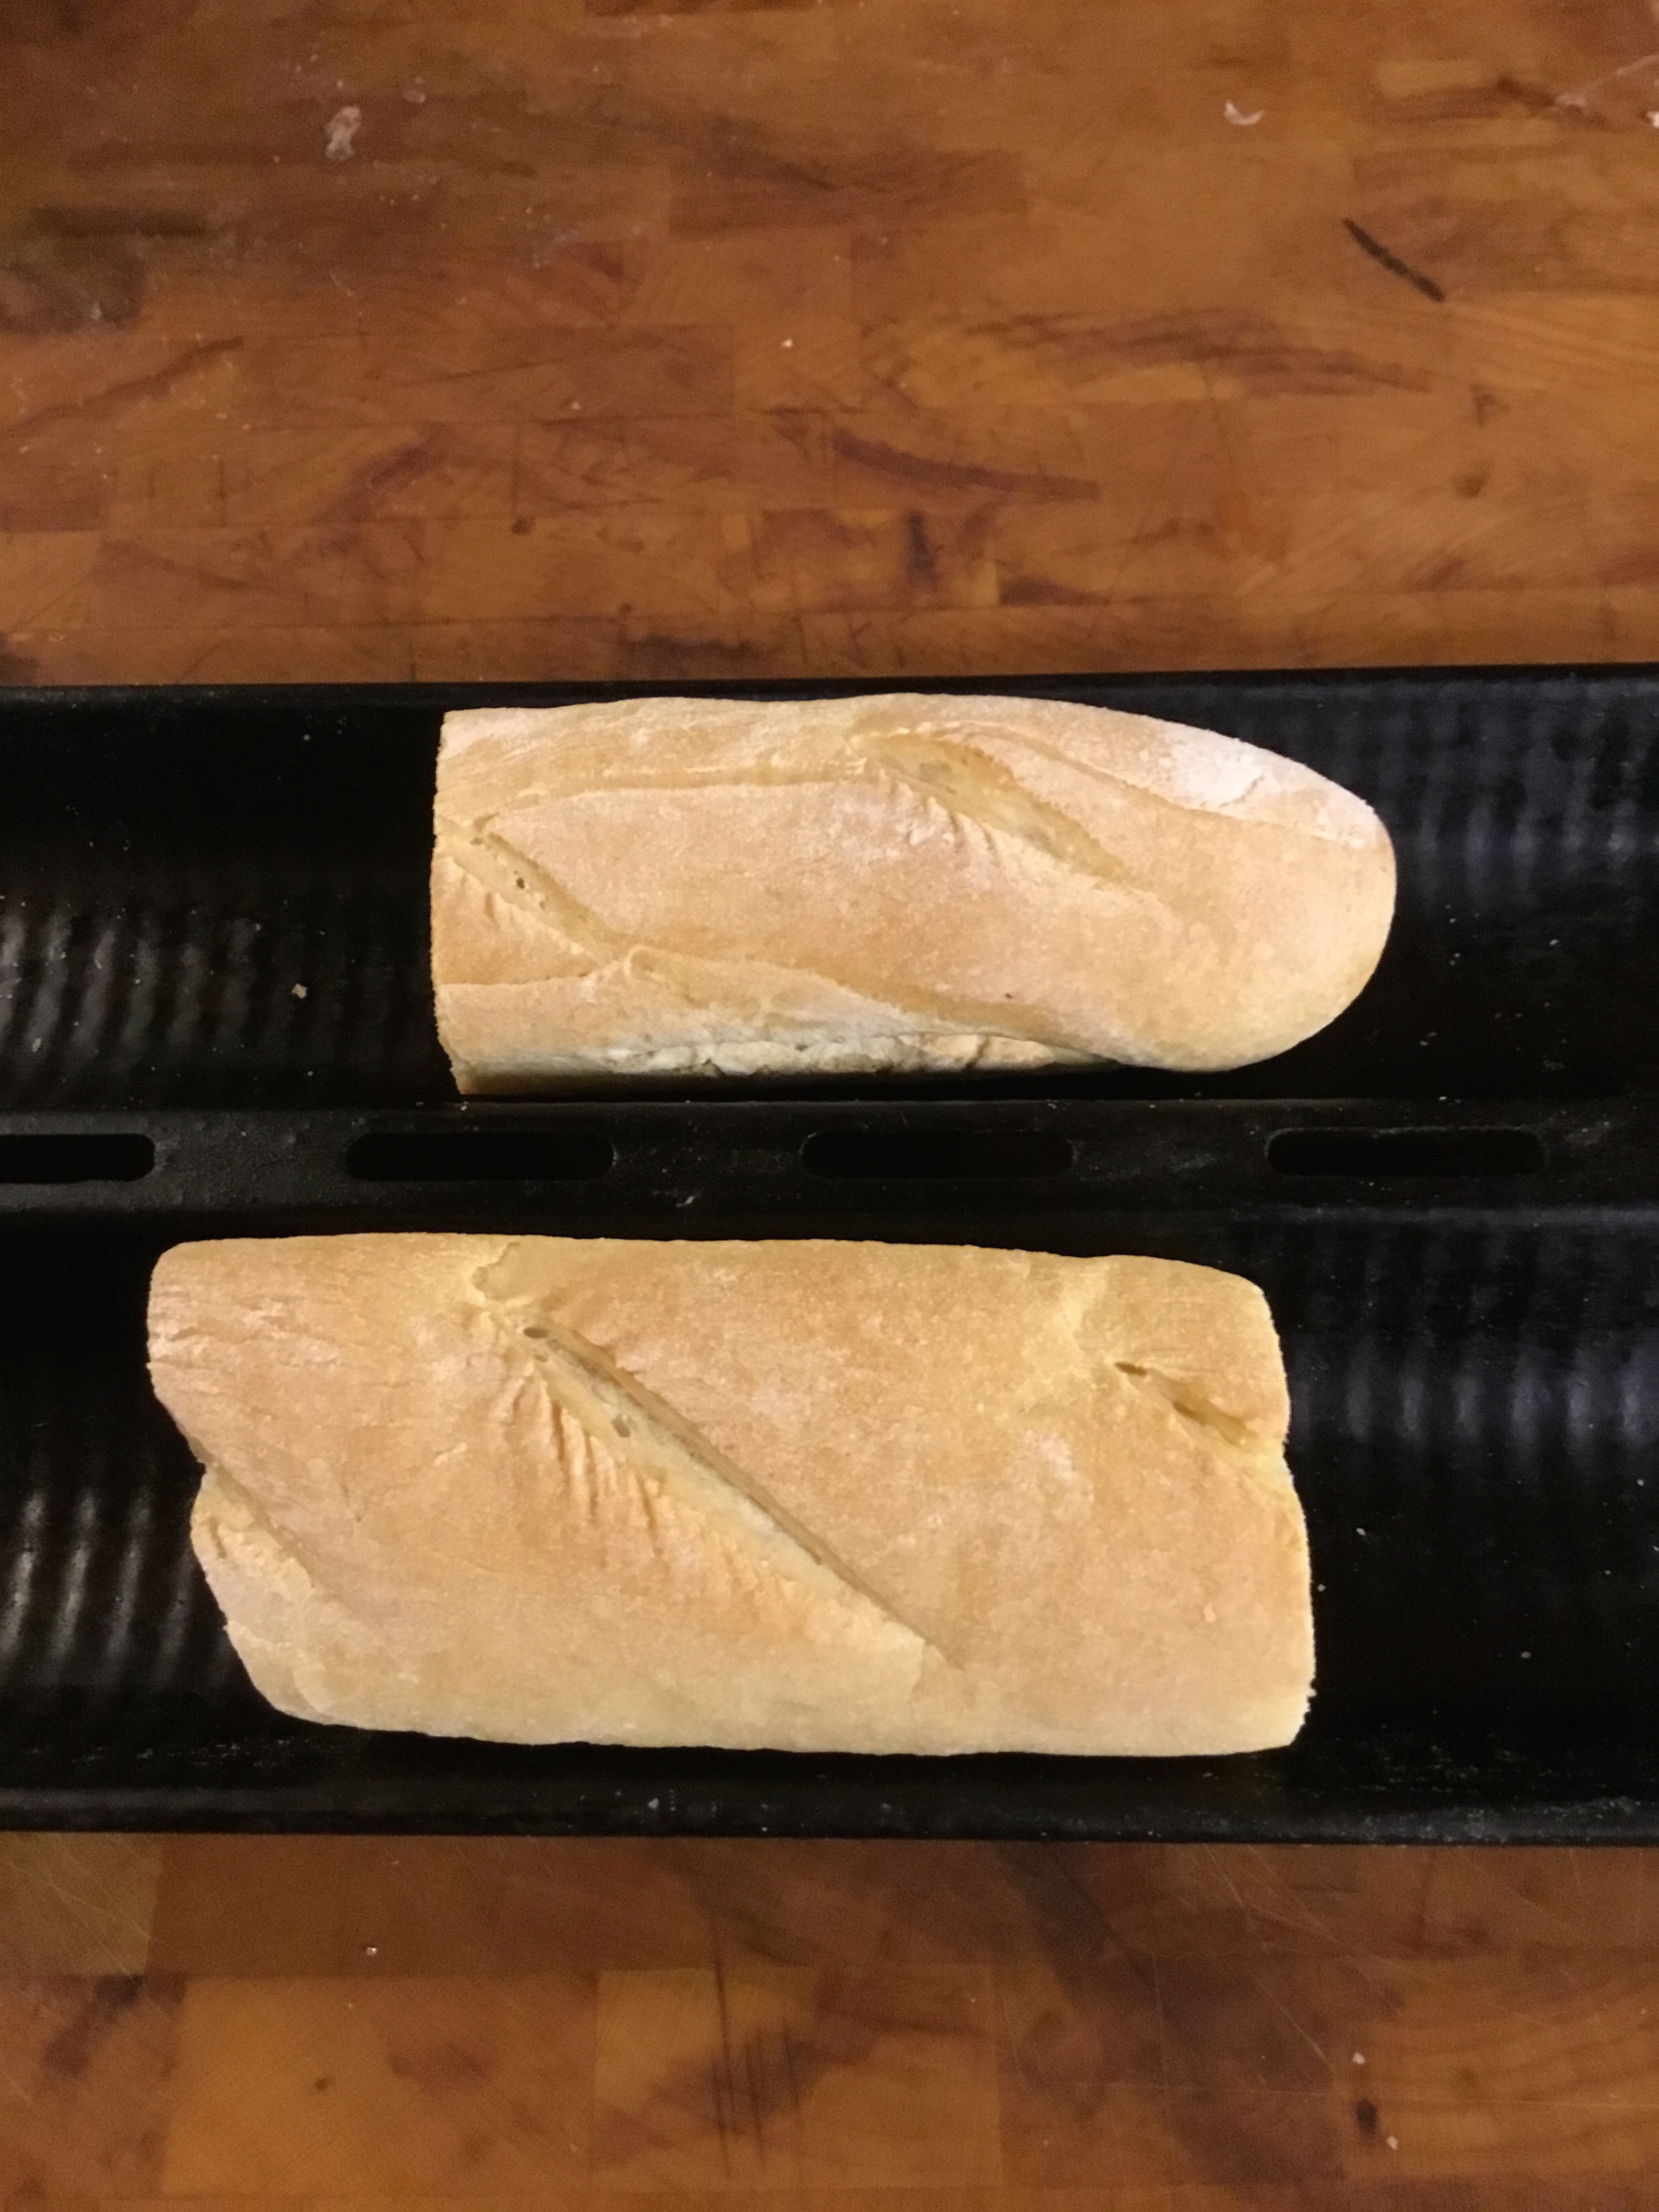
Creole French Bread cut into sandwich sized portions
Creole French Bread, also known as New Orleans French Bread, is not really French bread at all. French bread, in the form of the classic baguette, is a simple bread made with salt, yeast, flour and water. Creole French Bread is closer to an Italian bread, in that it is enriched or fortified with some form of fat, and usually a small amount of sugar. (Red Star yeast has an excellent concise run down of what fat adds to a loaf.)
If you do a quick check on the internet, you will find various recipes for this bread using a number of different fats. Commercial varieties often use vegetable shortening, though one of the most famous ones uses soy oil. Why such cheap ingredients? Because those folks are out to make a buck, and pennies matter. As a home baker not concerned with economies of scale, I use as high a quality of ingredient as possible. The following recipe, which I have made weekly for years, uses olive oil. This will make two baguettes, two po-boy buns, or a small loaf.
Creole French Bread
For the Dough:
1 teaspoon Salt
1 and 1/2 cups of All Purpose or Bread Flour (I like King Arthur Flour)
3/4 cup warm Water
1 tablespoon Olive Oil
For the Yeast:
2 Tablespoons warm Water
1 teaspoon organic Sugar
2 teaspoons instant Yeast (I end up buying two pound bags of Red Star regularly)
I make the dough in our thirty something year old Kitchenaid stand mixer-they weren’t kidding when they printed “Heavy Duty” on the side of the machine. Use the dough hook attachment, and mix until a ball of dough is formed.
The next step is the yeast mixture. I combine the three ingredients in a one cup measurer that I also use for the flour. Stir, and I let it sit until the mixture rises to the top of the measuring cup. That also gives the dough a little time to hydrate. Mix those together with the dough mixture, though a little additional flour is usually necessary to keep the dough from being overly sticky. Now it’s time for the rise.
Southern Appalachian Dough Bowl
Any oiled container will do to hold the dough for the first rise, but old school Southerners insist on wooden dough bowls. This one was made by Loyd George of Decatur, Alabama, out of Tulip Poplar. Cover the dough with a damp kitchen towel, and let rise. How long will depend on the temp of your kitchen. The general rule is to let it double in size, usually around an hour.
For baguettes/po-boy buns, a loaf must be formed by hand. Divide the dough in half, and form into an oval. Fold over once longways, and roll out the loafs from the middle outward. (King Arthur has a great tutorial showing how to do this.) For baguettes, it’s easier to put the loaves in a baguette pan; po-boy buns go onto a baking sheet, and are slightly flattened out. Loafs can go onto a baking sheet or a loaf pan. All must be covered with a towel, and allowed to rise again.
Here’s where the bread paths diverge. I cook po-boy buns at 375 degrees, loaves at 400, and baguettes at 450. Baguettes need to be slashed to keep from splitting open while baking, while slashing is optional for the loaves, and never done with po-boybuns. Cooking times are thirty minutes or more for buns and loaves, and twenty minutes or so for the baguettes.
Slash Patterns on Baguettes, Done with a Serrated Bread Knife
The resulting bread should be crispy crunchy on the outside, and incredibly soft on the inside. The superiority of this bread to any commercial one will become apparent at the first bite. It only stays fresh for about a day, but can be frozen and warmed up with little noticeable change in quality. For one use of this bread, see my post on Creole Onion Soup. You’ll end up neglecting the soup for the bread.
What we have here is yet another recipe from the magnificent Picayune Creole Cook Book. I should start with a quote from the book itself about this dish: “It is a simple, elegant dish, within the means of everyone.” At least everyone who has a chicken in their pot. We always refer to this dish as just “Brown Sauce Chicken.”
I am going to get all Frenchified on you, as the cookbook gives the recipe names in both English and French. This is also “Fricassée de Volaille, Sauce Brune.” This is an important distinction as a Fricassee is a distinctive method of cooking.
The original recipe uses a whole chicken cut up, including the liver, heart, and gizzards, so think of this as a chicken cooked in its own giblet gravy. Mine is a simpler version for two people, as usual.
Stewed Chicken, Brown Sauce
1 Chicken Breast, preferably bone in and skin on
1/2 Onion
1 Tablespoon Lard, Oil, or Butter
1 Tablespoon Flour
1 sprig Thyme and Parsley
1 Bay Leaf
Salt and Pepper
Begin by cooking the onions in the fat (lard, oil, butter) until soft. I always use the heaviest cast iron skillet I have, but that’s just me. Then add the flour and make a brown roux with it. A roux, aka “Creole Napalm,” is really a matter of practice and patience. A brown roux should be dark brown, the darker, the better the taste. Whatever you do, don’t stop stirring, or let this stuff splatter on you. When satisfied, add the chicken, and brown it as well.
Here comes the fun part. Add stock or water, herbs, and seasonings, and stir well. Cover the pot and simmer for thirty minutes or so on your stove’s lowest setting (mine is 600 btu’s), or an hour for a whole chicken, and you’re done. Check frequently to make sure that the chicken does not stick, or “lay on,” as we like to say. Serve with rice, preferably Louisiana rice, or pasta. Potatoes will also work.
This dish is simple and amazingly good. It’s also a perfect way to practice your skills as a Fricassee cook.
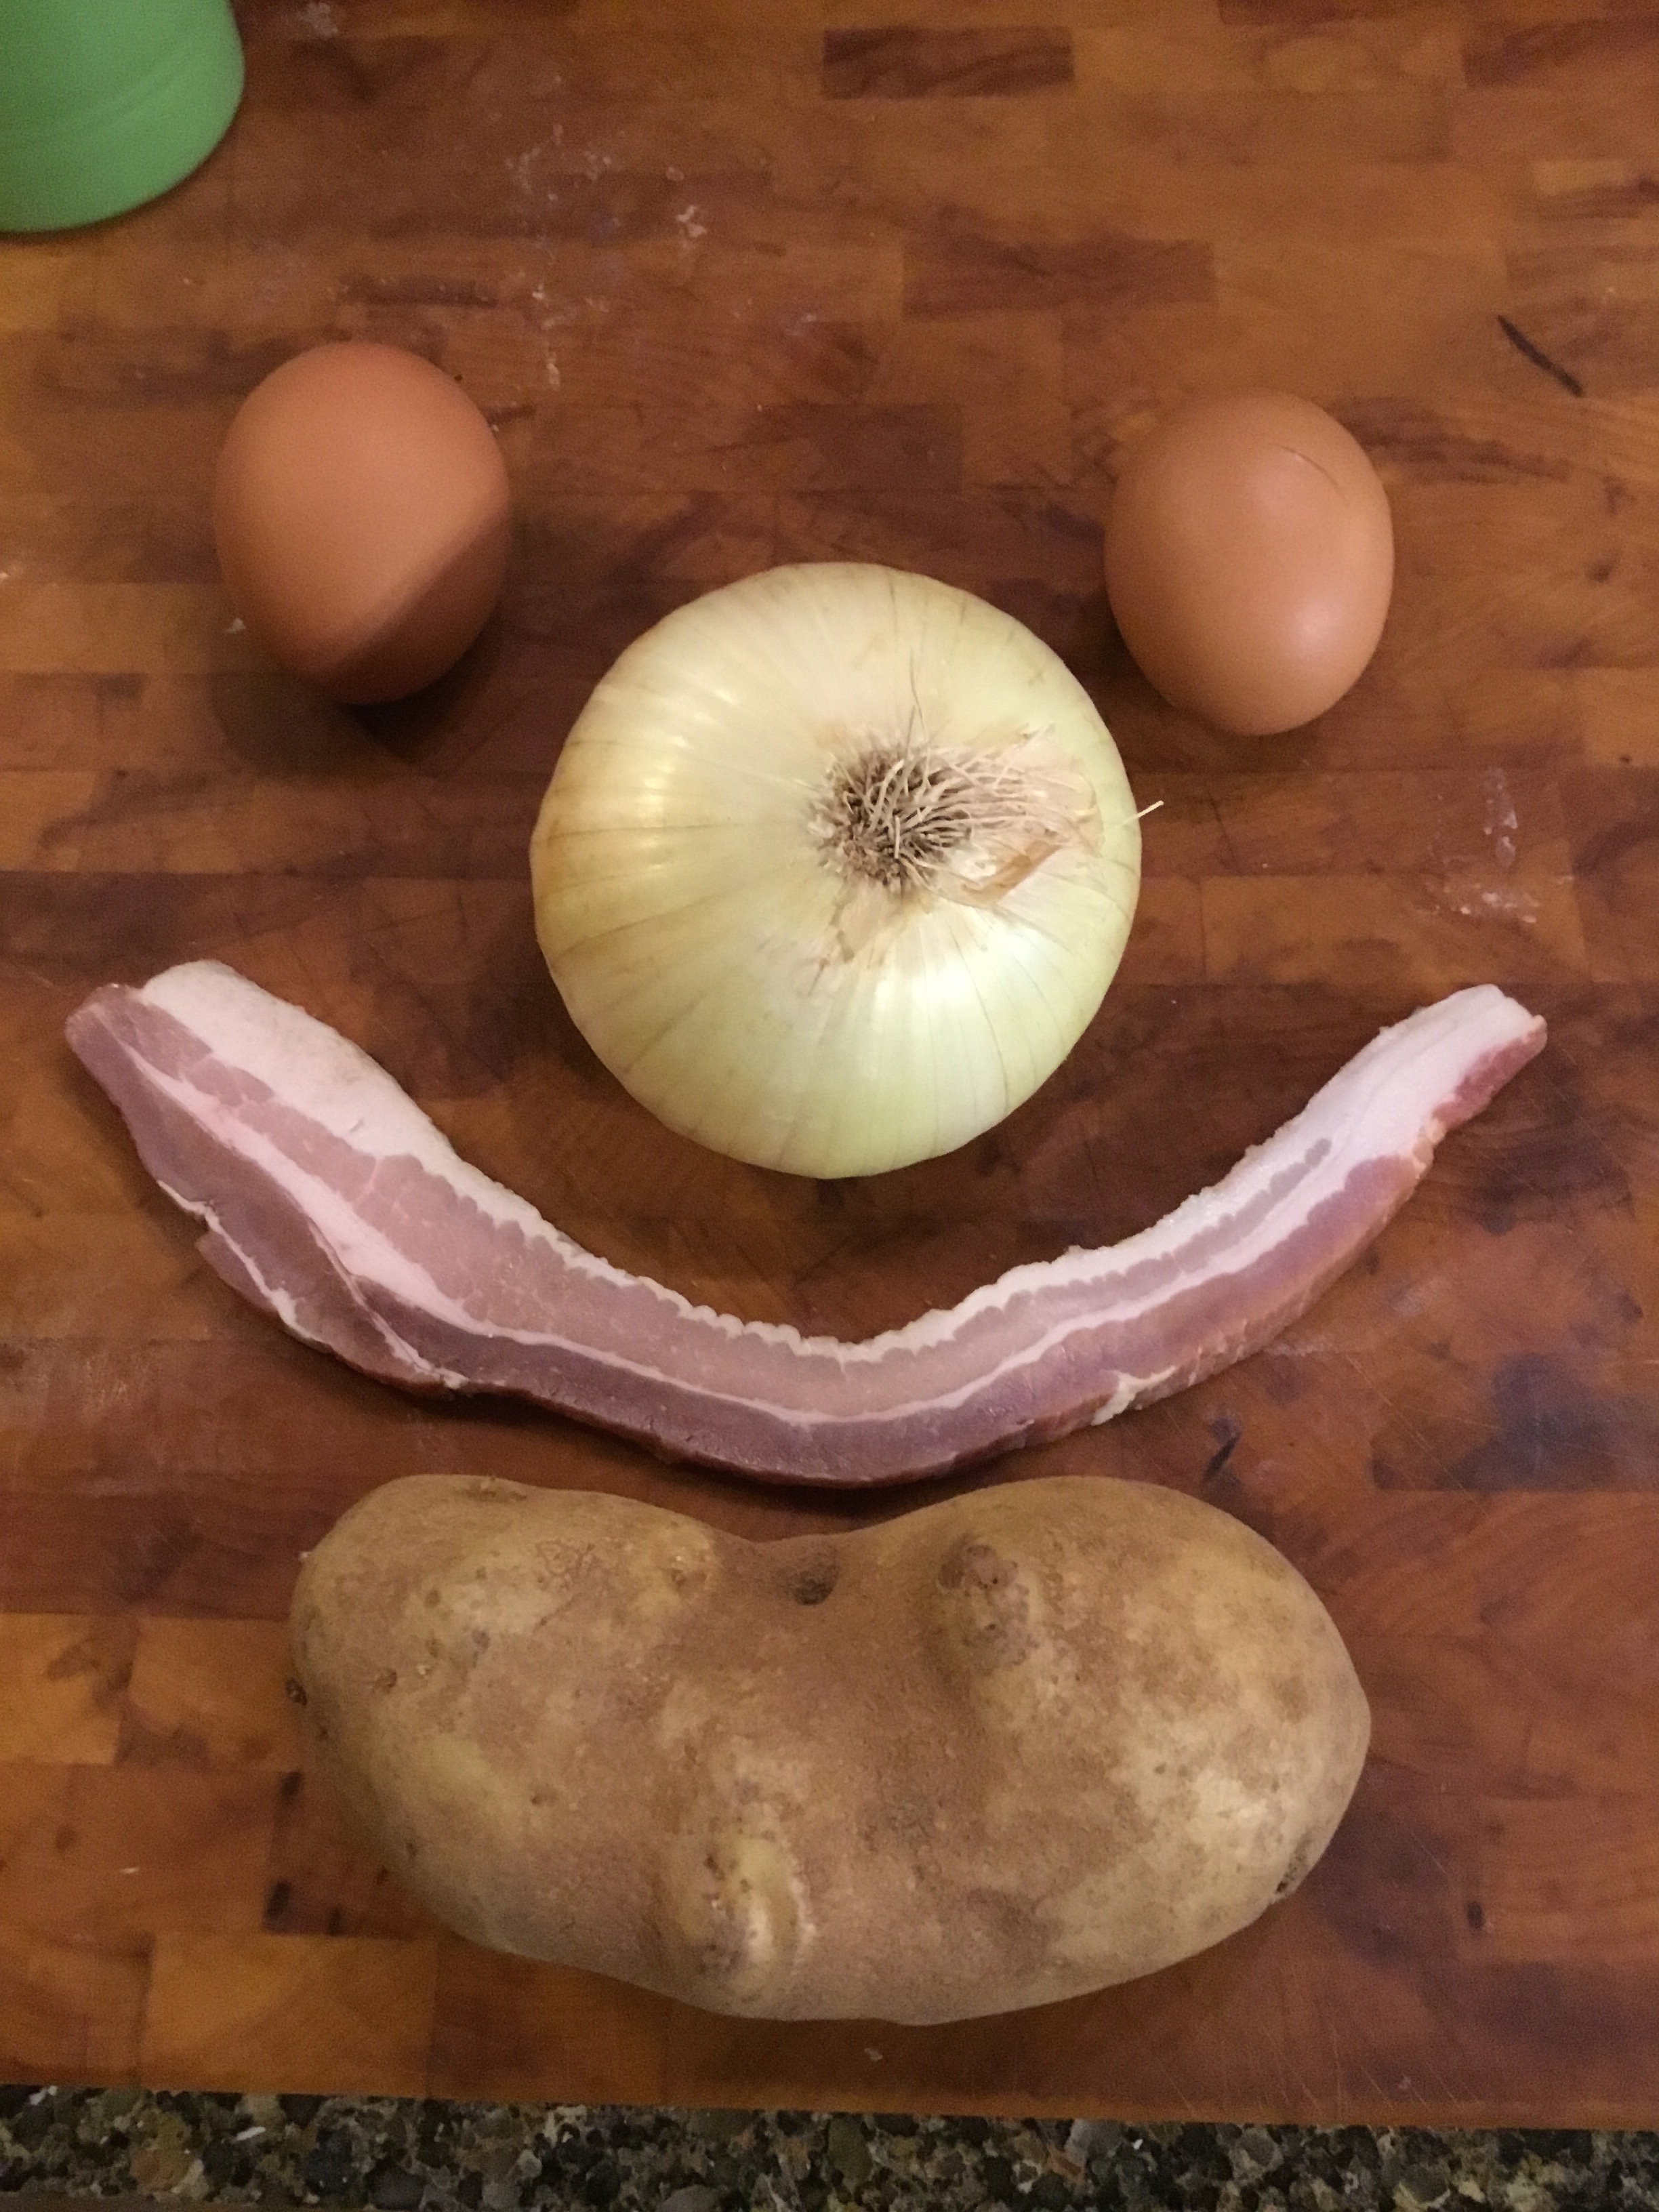
The Magic that these Four Ingredients can make . . .
What we have here is a slightly southern-ed up version of the classic German all around dish. Though it is thought of as a breakfast item on this side of the pond, it is excellent at any meal. This is a meal for two here, but it can be scaled up to practically any level.
Ingredients
One Slice of Bacon
One Large Potato, cubed
One-Half of an Onion, chopped
Two Eggs
Salt and Pepper
In a heavy cast iron skillet, cook the bacon until it is crisp. Remove the bacon from the skillet, and add the cubed potato while the bacon fat is still hot. If necessary, add some olive oil, though this is usually not necessary. Salt and Pepper. Fry the potatoes until brown, and add the onions. At the same time, pre-heat your oven to 400 degrees. Chop the bacon into small pieces, and add when the onion is almost softened.
Here’s where the Southern accent comes in. Instead of beating the eggs, place the eggs-fried egg, sunny side up style, on opposite sides of the pan. As soon as the eggs begin to set, pop the whole thing into the 400 degree oven. Keep a close watch, and serve while the yolks are still runny, if you want a dish where there won’t be any leftovers. It’s easier to clean up that way.
The variations on this dish are limitless. Add country ham, chives, scallions, garlic, green garlic, chopped tomatoes, fresh herbs, or anything else that you have on hand. Adapt it to the seasonal ingredients. That’s what good cooking is all about, anyway.
Great cookbook, or greatest cookbook? The latest reprint is available from Amazon.
I have made the following recipe from this cookbook literally more than a hundred times. Here’s what the Times Picayune had to say about it, when it is made properly:
You will then have a dish for which any old Creole would go on foot from Carrollton to the Barracks, a distance of fifteen miles, merely to get a taste of.
And now this is the modern version, that doesn’t require two whole chickens or two large onions. It’s for two people.
1 Chicken Breast
1/2 Onion
1/2 Sweet Pepper
1 Clove Garlic
1 Tablespoon Peanut Oil
1 Tablespoon Flour
1 Pint of Tomatoes
White Wine for de-glazing
Salt and Pepper
Thyme and Oregano
Heat the oil in a thick cast iron skillet, and add the flour. It’s time to make a roux! That’s what thickens the Creole sauce. I’m channeling Marcelle Bienvenu, who wrote another great cookbook, Who’s Your Mama, Are You Catholic, and Can You Make a Roux?
A “blonde” roux is preferable for this dish, so stir the flour until it browns only slightly. Add the chicken and let it brown nicely. A bone in, skin on, breast is preferred
When the chicken is browned, add the onions and pepper, which should be finely diced. When they are softened, add the garlic. Then de-glaze the pan with white wine.
Now it’s time for a little technique: milling tomatoes, using the finest insert that comes with the food mill.
Truthfully, this step is optional, but the end result is a seed free sauce of superior texture and taste. It doesn’t hurt to have some home canned, locally grown, tomatoes to mill, as pictured. Just crank the tomatoes right over the skillet. I’ll do a deep dive into food mills eventually–they are a French invention, and the best ones are still made there.
Once the tomatoes are milled, season with salt, pepper, and herbs. Once the sauce is simmering, put a lid on the skillet and turn it down to the lowest setting possible, the lower, the better. Just add water or stock as it cooks down. In forty minutes or so, you have a dish worth walking fifteen miles for. And that is just to taste it.